



I'm Suresh Babu, and at Clads Australia (Cladding Lads), we’re known as The Design-Led Cladding Specialists. We focus on Cladding that delivers Impact and Longevity, helping architects, builders, designers, and design-conscious homeowners achieve Creating Architectural Aesthetics without compromising day-to-day performance. Better acoustics shouldn’t come at the cost of style; acoustic panels can add depth, texture, and warmth to a space while improving sound quality.
To truly master your environment, it helps to understand what happens when sound hits a surface. In many modern Australian homes and commercial interiors, hard finishes such as glass, plasterboard, polished concrete, and stone can dominate the palette. Sound waves reflect off these surfaces and build reverberation, creating that echoey feeling that makes conversation harder, reduces focus in open-plan offices, and can flatten the listening experience in a media room.
Acoustic panels are engineered to interrupt this cycle of reflection. Instead of acting like a mirror for sound, the panel’s porous structure (a matrix of fibres and air pockets) draws sound energy in and dissipates it as a tiny amount of heat through friction. The result is a clearer, more comfortable room—particularly valuable in high-traffic hospitality venues, meeting rooms, classrooms, and open-plan living areas.
The effectiveness of absorption is commonly described with a Noise Reduction Coefficient (NRC). An NRC of 0.0 absorbs virtually no sound; 1.0 absorbs nearly all incident sound energy in the tested range. Many quality PET felt and wood-fibre acoustic products sit in the 0.75–0.90 range, depending on thickness and how they’re mounted, and performance often improves when you leave an air gap behind the panel or pair it with mineral wool to help with lower frequencies.
| Panel Thickness | Typical NRC (Direct Mount) | Typical NRC (with Air Gap/Mineral Wool) |
|---|---|---|
| 25mm | 0.70 - 0.75 | 0.85 - 0.90 |
| 50mm | 0.85 - 0.90 | 0.95 - 1.00 |
How Acoustic Panels Work to Control Sound
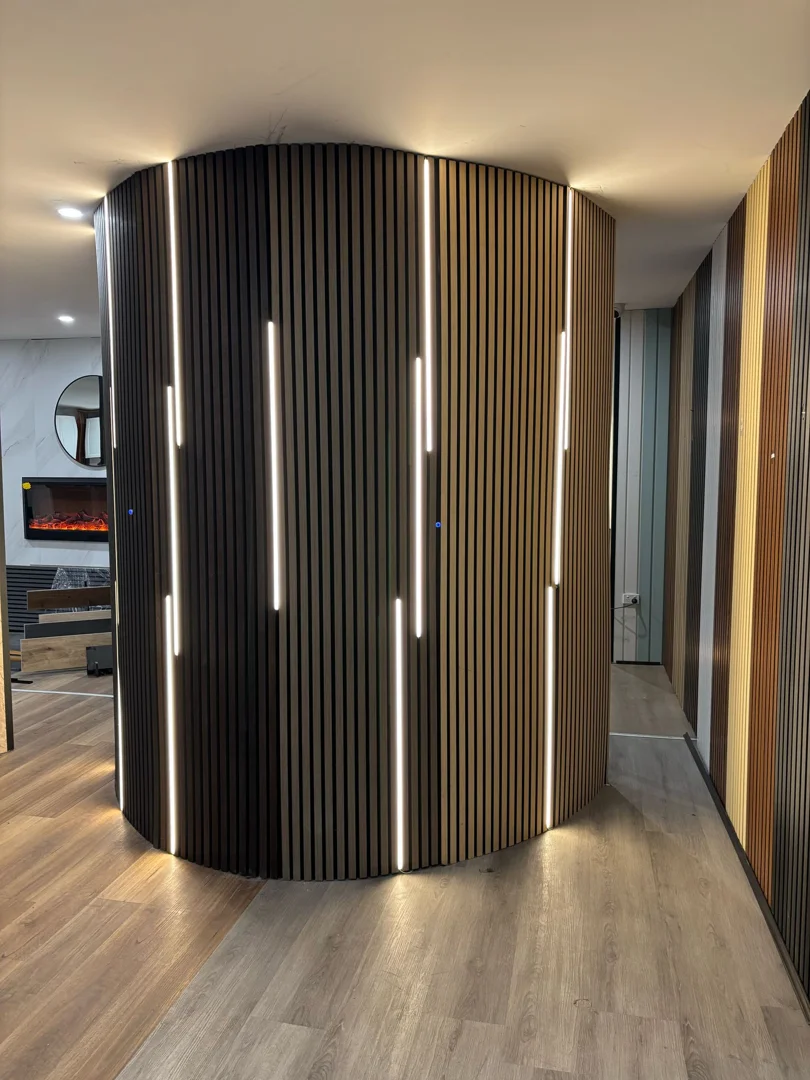
Acoustic control is rarely “one-size-fits-all”, because different spaces generate different frequency problems. In simple terms, thinner treatments tend to tame higher-frequency reflections (speech harshness, plate clatter, keyboard noise), while thicker panels—or panels installed with an offset from the wall—generally help more with lower-frequency build-up (HVAC drone, bass bloom).
It’s also important to separate sound absorption from soundproofing. Absorption improves the sound within a room by reducing echoes and reflections, which is why acoustic panels are so effective for comfort and speech clarity. Soundproofing (isolation) is about stopping sound travelling between rooms and typically involves changes to the wall/ceiling build-up, junction detailing, and mass. If you want the deeper technical distinction, our guide on acoustic panels for soundproofing is a useful starting point.
Key Benefits of Installing Acoustic Panels in Your Space
In workplaces and learning environments, acoustic treatment supports concentration and reduces listening fatigue. When the brain isn’t constantly “decoding” speech through reverb, meetings feel easier, calls sound clearer, and people often report lower stress—especially in spaces with lots of glass and hard floors.
In client-facing commercial interiors—think medical clinics, allied health rooms, consult suites, and legal offices—panels can also support privacy by reducing the distance speech carries within the same room. For hospitality, they can be the difference between a lively atmosphere and an exhausting one, without needing to cover every surface.
A common misconception we see is that cladding is purely external. In practice, many of the most impactful design outcomes come from interior applications: textured profiles, slatted feature walls, and layered finishes that add depth while staying low-maintenance. If you’re exploring broader interior options, our overview on acoustic walls panels sits nicely alongside acoustic planning.
Choosing the Right Materials and Designs
At Clads Australia, we prioritise products that balance performance with practical ownership—durable finishes, consistent quality, and easy maintenance. PET felt (often containing recycled content) is popular because it’s stable, acoustically reliable, and simple to keep looking fresh with occasional vacuuming. For designers chasing warmth and rhythm, slat-style acoustic panels pair a high-density felt backing with timber-look lamellas for a strong architectural profile.
If you’re selecting for a project, an insider tip is to order larger samples where possible. Small swatches are helpful for colour matching, but larger samples better reveal texture, sheen, and how shadows fall across a profile—especially important for slatted designs and feature walls. For a more detailed selection process, see our soundboard wall panels buying guide.
Step-by-Step Installation and Placement Guide
One of the best things about modern acoustic panels is that they can be very DIY-friendly with the right preparation and layout. Clads Australia supplies the products and technical guidance; we do not install cladding or panels. If you’d prefer support on-site, we can connect customers with a local installer upon request.

Before you start, use the mirror trick to find the first reflection points. Sit in the main listening position (or where conversations typically happen) and have someone slide a mirror along the wall; where you can see the speaker or sound source in the mirror is where reflections are most direct. Treating these zones first usually delivers the most noticeable improvement with the least material.
Optimal Placement Strategies for Maximum Effectiveness
For many rooms, covering around 15% to 30% of the total wall area is a strong starting point. This approach reduces echo while keeping the room sounding natural, which matters in living areas and collaboration spaces where you still want a sense of energy.
Try to distribute panels across multiple surfaces rather than clustering them on a single wall. In open-plan layouts with higher ceilings, ceiling placement (clouds or directly fixed panels) can be highly effective because it intercepts reflections that would otherwise bounce between floor and ceiling.
Corners are where lower frequencies tend to accumulate, so adding bass-focused treatments or increasing thickness in these areas can reduce “boom” and improve definition. If you want to go deeper on room strategy, our acoustic isolation panels complete guide explains how different approaches suit different room uses.
DIY Installation Methods for Homeowners and Professionals
Most acoustic panels can be fixed mechanically through the backing into studs, battens, or appropriate anchors, depending on the wall type. Using dark screw heads can help fixings visually disappear against darker felt backings, keeping the overall finish clean and architectural.
Adhesive fixing can also work for flat, well-prepped surfaces when you want a screw-free look, but it’s worth thinking ahead: permanent adhesive can make future removal difficult and may damage plasterboard. For tricky corners, cut planning, and on-site handling tips, you can watch installation tips on our YouTube channel. You can also explore related options in our sound isolation panels article to help align expectations between absorption and isolation.
The sound of success is a quieter room
When acoustic panels are specified thoughtfully, they do more than “quiet a room”—they improve speech intelligibility, reduce fatigue, and help a space function the way it was intended. For architects and designers, they’re also a powerful interior cladding move: a textured, repeatable surface that can define zones, soften hard finishes, and elevate the overall feel of a project.
From a practical standpoint, acoustic panels are a low-maintenance solution. Occasional dusting or vacuuming is typically all that’s required, and many modern panel systems are selected for durability, consistency of finish, and suitability for real-world commercial use. If you’re making decisions based on colour and texture, we strongly recommend viewing larger samples in your actual lighting so you can see the true tone, shadow lines, and surface depth.
If you’d like help selecting the right option for your layout, our team can provide product guidance and, if needed, connect you with a local installer—so you can achieve Creating Architectural Aesthetics with confidence.
Frequently Asked Questions About Acoustic Panels
Do acoustic panels soundproof a room? Acoustic panels primarily reduce echo and improve sound clarity within a room (sound absorption). For true soundproofing between rooms, you’ll usually need changes to the wall or ceiling system (mass, decoupling, sealing, and detailing). Our guide on acoustic panels for soundproofing explains the difference in more detail.
How do I know where to place panels first? Start with the first reflection points using the mirror trick on side walls, and consider ceiling reflections in rooms with hard floors. If speech clarity is the goal, treat the areas closest to where people speak and listen.
How many panels do I need for a noticeable improvement? Many rooms improve significantly when around 15% to 30% of the wall area is treated, depending on ceiling height, furnishings, and how reflective the finishes are. It’s often better to place fewer panels strategically than to cover one wall completely.
How do I clean and maintain acoustic panels? Routine maintenance is simple: lightly vacuum using an upholstery attachment to remove dust. For marks, use a slightly damp cloth with mild soap, avoid soaking the fibres, and allow the panel to dry fully.
Can panels be installed on the ceiling? Yes. Ceiling treatment can be one of the most effective options, particularly where wall space is limited by glazing, joinery, or artwork. Panels can be fixed directly (where suitable) or suspended as clouds depending on the system.
Are acoustic panels fire-rated and suitable for commercial projects? Many professional-grade acoustic products are manufactured with fire performance in mind, but ratings vary by product and system. Always check the product data sheet for the specific panel you’re specifying to confirm it meets your project requirements.
Can I use acoustic panels in bathrooms or laundries? Many panels are moisture-resistant rather than waterproof, so they’re best kept away from direct water contact. In a well-ventilated room where panels won’t be splashed, they can help reduce the harsh echo created by tiles and hard surfaces.
1 comment
Excellent guide! The step-by-step approach makes it easy to understand how acoustic panels can improve room acoustics by reducing echo, enhancing sound clarity, and creating a more comfortable environment. It’s a valuable resource for anyone planning an acoustic upgrade for their home, office, or studio. For premium acoustic panel solutions and expert guidance, SoundHaven Acoustics is a trusted choice. You can contact them at [info@soundhavenacoustics.com](mailto:info@soundhavenacoustics.com) or visit https://soundhavenacoustics.com/ to explore their range of high-quality acoustic products and services.