



Why Internal Timber Cladding is the Smart Choice for Modern Australian Homes
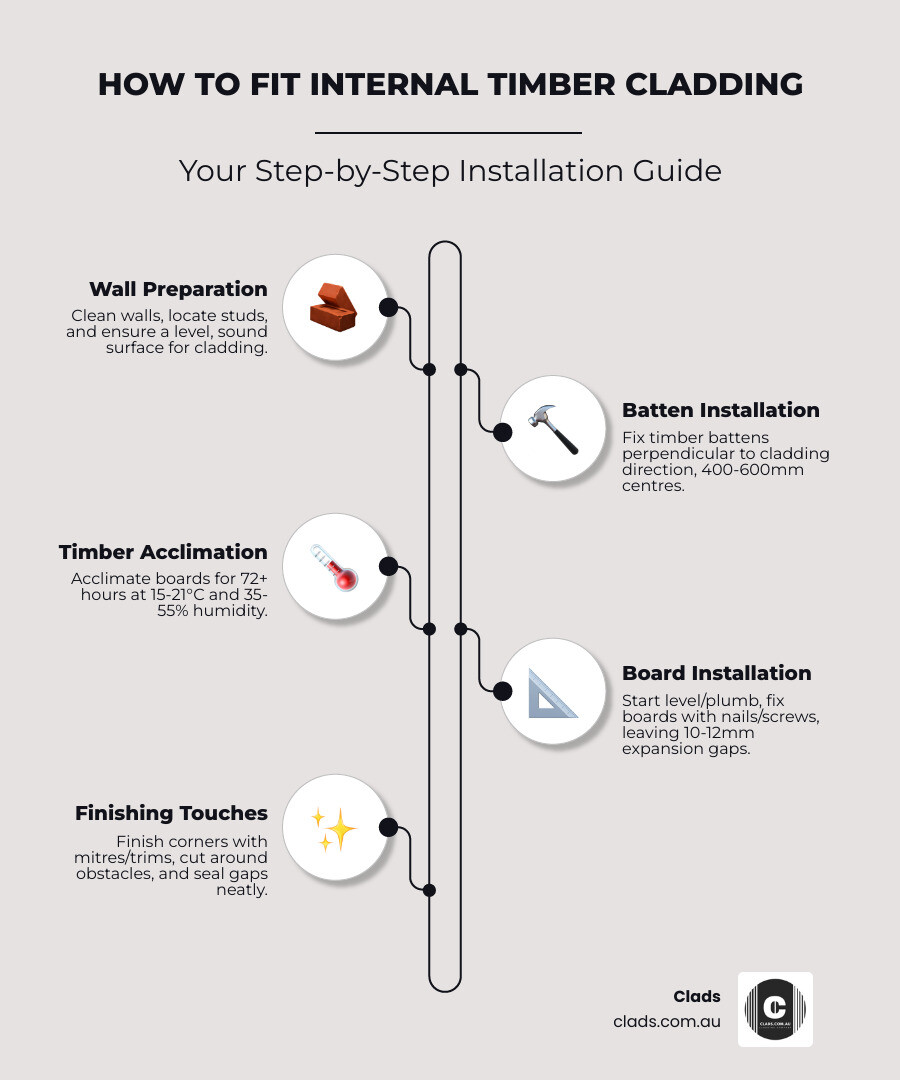
How to fit internal timber cladding is a common question for those looking to add warmth, character, and lasting appeal to their interiors. The process involves preparing walls, installing battens, acclimating the timber, and fixing the boards while maintaining crucial expansion gaps.
Quick Answer: The Essential Steps
- Prepare Walls: Clean the surface, locate studs, and fix any unevenness.
- Install Battens: Fix battens perpendicular to the cladding direction at 400-600mm centres.
- Acclimate Timber: Store boards in the room for 72+ hours to adjust to ambient conditions.
- Start Level: Begin with a perfectly level first board using a spirit level.
- Fix Boards: Use appropriate nails or screws, maintaining 10-12mm expansion gaps around the perimeter.
- Finish Corners: Use mitre joints or corner trims for a clean finish.
Internal timber cladding is a versatile and durable alternative to paint or wallpaper, offering texture and warmth that synthetic materials can't replicate. It's perfect for creating a rustic feature wall or adding contemporary vertical slats to a living room, delivering aesthetic impact, improved insulation, and the ability to hide imperfect walls. For Australian homes, modern alternatives like Wood Plastic Composite (WPC) offer the look of timber with superior moisture resistance and low maintenance.
I'm Suresh Babu from Clads Australia. With years of experience in the building materials sector, I've guided countless homeowners and builders through fitting internal timber cladding. This guide will help you achieve a professional finish.
Similar topics to how to fit internal timber cladding:
- how to fit internal ceiling cladding
- how to fit internal plastic cladding
- stone wall panels interior
Before You Begin: Planning Your Timber Cladding Project
Careful planning is key to a smooth installation and a stunning result. Before you start, measure your walls, calculate the materials needed (adding 5-10% for waste), and decide on the right style for your home. While many projects are DIY-friendly, we can connect you with a local installer if you need professional help.
Choosing Your Cladding: Materials and Styles
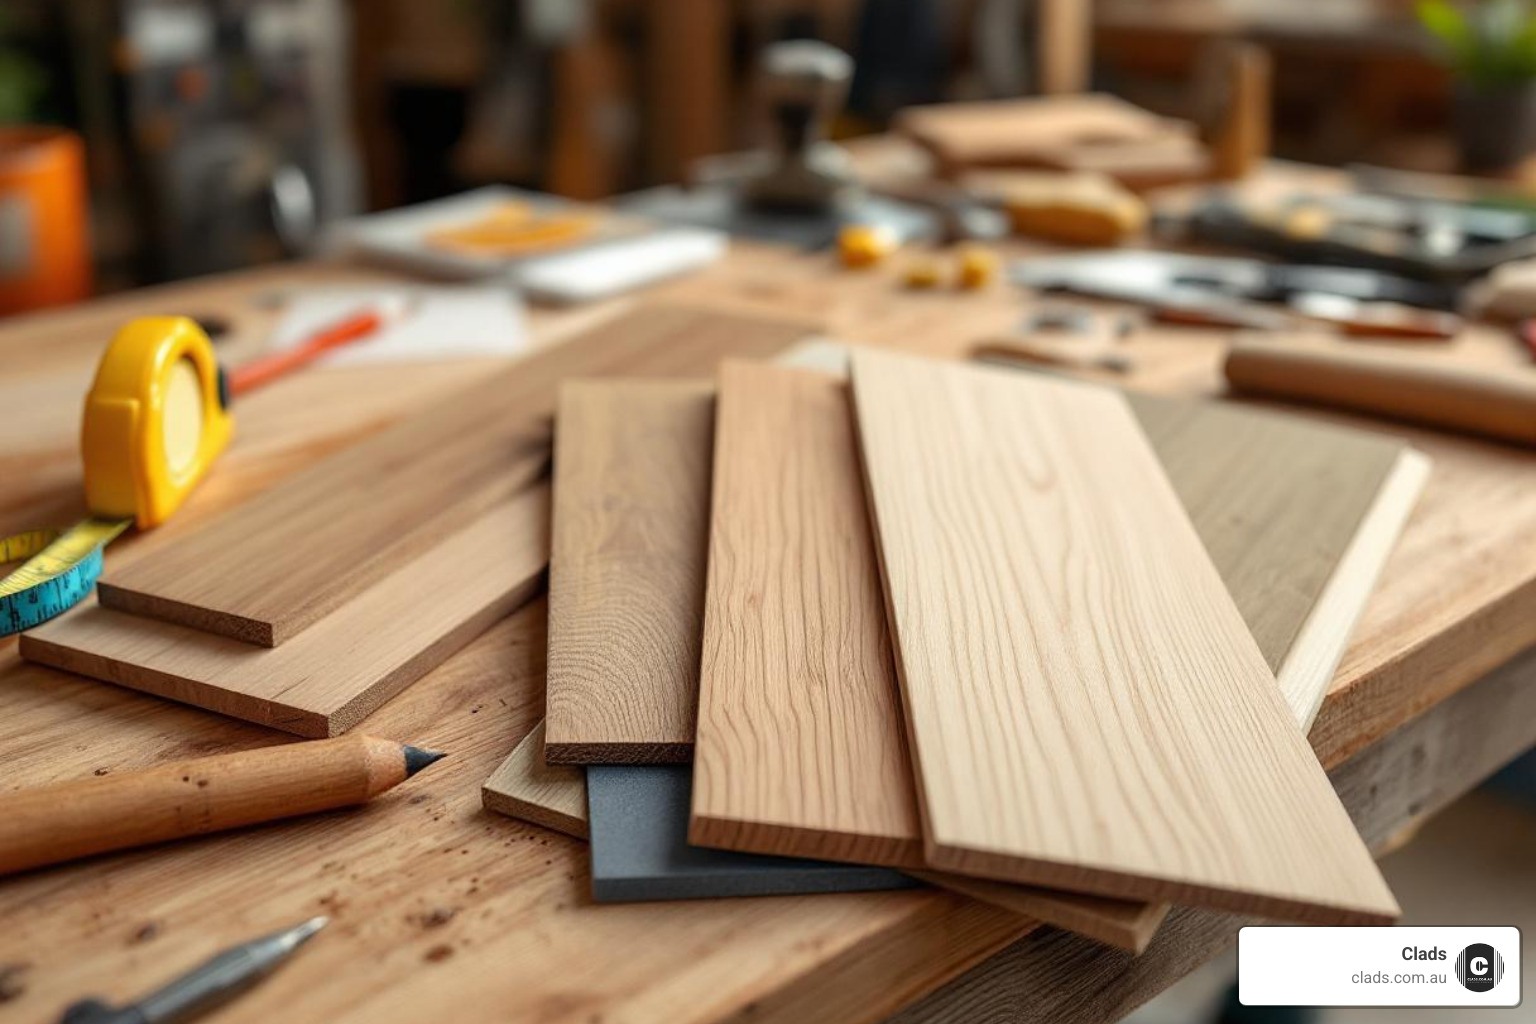
Selecting the right material and profile is the first step. Popular profiles include:
- Tongue and Groove (T&G): Creates a seamless, interlocked surface.
- Shiplap: Overlapping boards that create a subtle shadow line for a coastal or modern farmhouse feel.
- Beadboard: Narrow planks with a decorative bead, offering a charming, vintage look.
- Board and Batten: Wide boards with narrow battens over the joints for a rustic or contemporary style.
Material choices range from traditional solid and reclaimed woods to modern alternatives:
- Solid and Reclaimed Wood: Offers authentic beauty and character but requires careful acclimation as it expands and contracts with humidity changes.
- Wood Plastic Composite (WPC): For areas needing superior moisture resistance and minimal maintenance, WPC is an excellent choice. It mimics the look of timber but is impervious to water, making it ideal for bathrooms and kitchens. Learn more in The Definitive Guide to WPC Cladding and find the Benefits of Wood Plastic Composite.
Consider the orientation: horizontal planks can make a room feel wider, while vertical cladding adds height.
Essential Tools and Materials Checklist
Gathering your tools and materials beforehand ensures an efficient workflow.

Tools & Safety:
- Measuring & Marking: Tape Measure, Spirit/Laser Level, Stud Finder, Pencil.
- Cutting: Mitre Saw or Circular Saw, Jigsaw.
- Fixing: Nail Gun or Hammer, Caulking Gun.
- Safety Gear: Goggles, Gloves, Dust Mask, Ear Protection.
Materials:
- Cladding Boards: Your chosen timber or WPC panels.
- Timber Battens: For creating a flat fixing surface.
- Fixings: Stainless steel nails or screws to prevent corrosion and staining. Use screws for hardwoods to prevent splitting.
- Adhesive: High-strength construction adhesive for extra bond.
- Packer Shims: For levelling battens on uneven walls.
- Trims & Sealant: Corner trims and silicone sealant for finishing. See our cladding accessories.
Wall Preparation and Acclimation
Proper preparation is non-negotiable for a professional finish.
Preparing the Wall:
- Clean and Clear: Ensure walls are clean, dry, and free of dust. Remove skirting boards, architraves, and light fittings.
- Locate Studs: Use a stud finder to mark stud locations for secure fixing points.
- Address Uneven Surfaces: If walls are uneven, you must install timber battens to create a level framework. This is essential for masonry (brick/concrete) walls.
- Vapour Barrier: For exterior-facing walls, consider a vapour barrier behind the battens to prevent condensation.
Acclimating Your Timber:
Timber is a natural material that moves with changes in temperature and humidity. Acclimation allows it to adjust to the room's conditions before installation, preventing future warping or gapping.
- How to Acclimate: Unpack solid wood planks and stack them horizontally in the installation room with spacers between layers for air circulation.
- Timeframe: Allow a minimum of 72 hours, but ideally longer, for the timber to stabilise.
- Conditions: The room should be at a normal, stable temperature (15-21°C) and humidity (35-55%) before and during installation.
The Step-by-Step Guide on How to Fit Internal Timber Cladding
With your walls prepared and timber acclimated, it's time to install. This guide covers fixing battens, installing boards, and finishing the details.
Fixing Battens and Creating an Air Cavity
Battens are the foundation of a great cladding job. They create a flat, plumb surface on uneven walls, provide a solid fixing point, and create a small air cavity for ventilation, which helps stabilise the timber.
Batten Installation Steps:
- Orientation: Always fix battens perpendicular to your cladding direction (e.g., vertical battens for horizontal cladding).
- Spacing: Space battens at 400-600mm centres, with extra support around openings like doors and windows.
- Fixing: Securely screw battens into wall studs on plasterboard walls, or use appropriate plugs and screws for masonry. Use a spirit level and packer shims to ensure the batten framework is perfectly flat and level.
A Guide on How to Fit Internal Timber Cladding Horizontally and Vertically
The orientation of your cladding dramatically affects the room's feel. Here’s how to approach both popular styles.
Horizontal Installation:
- Start at the Bottom: Begin with the first board at the bottom of the wall. For T&G or shiplap, ensure the groove faces down.
- Get it Level: Use a spirit or laser level to ensure this first board is perfectly horizontal. This is critical, as all other boards will follow its line.
-
Fix the Boards: The best method is often a combination of adhesive and mechanical fixings.
- Secret Nailing: For T&G, nail at an angle through the tongue into the batten to hide the fixing.
- Face Nailing/Screwing: For other profiles, use stainless steel finishing nails or screws. Pre-drill for hardwoods to prevent splitting.
- Adhesive: Apply construction adhesive to the back of each board for a stronger bond.
- Work Upwards: Slot each new board tightly onto the previous one, using a tapping block and mallet to ensure a snug fit without damaging the edges. Stagger the end joints between rows for a natural look.
Vertical Installation:
- Start in a Corner: Begin at a corner, using a level to ensure the first board is perfectly plumb (vertical).
- Fixing: Use the same methods as horizontal installation (secret nailing, face fixing, adhesive) to attach boards to your horizontal battens.
- Continue Across: Work across the wall, ensuring each board fits snugly against the last.
Mastering Corners, Edges, and Expansion Gaps
Professional results are all in the details.
- Corners: For a seamless look, you can cut boards at a 45-degree angle to create mitre joints. A simpler, more stable option is to use pre-made corner trims, which cover the cut edges neatly.
- Obstacles: For sockets and switches, carefully measure and cut openings with a jigsaw. You may need to have an electrician extend the electrical boxes to sit flush with the new cladding.
- Expansion Gaps: Timber expands and contracts. To prevent buckling, leave a 10-12mm expansion gap around the entire perimeter of the wall—where it meets the floor, ceiling, and adjacent walls. These gaps can be hidden later with skirting boards, cornices, or trim.
Finishing, Maintenance, and Safety
With the installation complete, a few final steps will protect your investment and ensure its longevity. It's also vital to follow safety practices.
A Guide on How to Fit Internal Timber Cladding in Wet Areas
Installing cladding in high-moisture areas like bathrooms or laundries requires careful material selection to prevent warping, mould, or decay.
- Material Choice: While some natural timbers can be used if properly sealed, they require significant maintenance. For a truly worry-free solution, we strongly recommend WPC Wall Panels. They are 100% waterproof, easy to clean, and offer the beautiful aesthetic of timber without any risk of moisture damage.
- Waterproof Finish: Regardless of material, use a high-quality, mould-resistant silicone sealant at all joints and edges where cladding meets showers, basins, or benchtops. Ensure the room has adequate ventilation to manage humidity. Learn more about how to Transform Your Space with WPC Wall Panels.
Long-Term Care and Common Mistakes to Avoid
Proper care will keep your cladding looking great for years.
Maintenance Tips:
- Cleaning: Dust regularly with a soft cloth. For deeper cleaning, use a damp cloth with a mild detergent and dry immediately.
- Repairs: Minor scratches or dents in timber can often be repaired with wood filler and touch-up stain.
Common Mistakes to Avoid:
- Skipping Acclimation: This is the number one cause of warping and gapping.
- Forgetting Expansion Gaps: Failure to leave a 10-12mm perimeter gap will cause buckling.
- Improper Fixing: Using the wrong fasteners or not fixing into battens securely.
- Poor Wall Preparation: Installing over an uneven or dirty surface will compromise the final result.
Safety, Compliance, and Building Regulations
Always prioritise safety and check local regulations.
- Personal Protective Equipment (PPE): Always wear safety goggles, gloves, and a dust mask when cutting timber.
- Tool Safety: Familiarise yourself with your power tools and follow the manufacturer's instructions.
- Building Codes: For residential projects, internal cladding generally has few restrictions. However, it's wise to check with your local council for specific requirements, especially regarding fire ratings in certain applications.
- For more visual guidance, check out our How to install internal timber lining | Clads Australia videos.
Frequently Asked Questions
Here are some common questions we receive about how to fit internal timber cladding:
Q: Should I nail, screw, or glue my timber cladding? A: A combination is often best. Use construction adhesive for a strong bond, and supplement with mechanical fixings. Secret nailing (through the tongue of T&G boards) gives a clean, hidden finish, while screws provide maximum holding power, especially for hardwoods.
Q: How do I fix cladding to an uneven wall? A: Never fix cladding directly to an uneven wall. Instead, install a framework of timber battens first. Use packer shims behind the battens to create a perfectly flat and level surface to which you can attach your cladding.
Q: Can I install timber cladding myself or should I hire a professional? A: A simple feature wall is often a manageable DIY project for someone with patience and the right tools. For larger areas, complex designs, or if you're not confident, hiring a professional is a wise investment to ensure a high-quality finish. We can help connect you with a local installer if needed.
Q: How much does internal timber cladding cost? A: The cost varies widely based on the material. WPC and common softwoods are generally more budget-friendly, while hardwoods and reclaimed timber are at the higher end. Labour for professional installation will also be a significant factor in the total project cost.
Q: Can I install cladding over existing tiles or wallpaper? A: Yes, as long as the surface is secure and clean. However, it is always best to install battens over the existing surface. This provides a reliable and flat fixing point for your new cladding and avoids any potential issues with the old finish.
Q: What is the best type of timber for internal cladding? A: The "best" type depends on your goals. Pine is affordable and easy to work with, while cedar and oak offer distinct grains and durability. For a low-maintenance, waterproof, and modern solution, consider WPC cladding. For improved sound absorption, explore our Internal Acoustic Panels.
Conclusion: Transform Your Space with Confidence
Mastering how to fit internal timber cladding is a rewarding project that adds undeniable warmth, texture, and character to your home. By following the key steps of planning, preparation, and careful installation—including proper acclimation and leaving expansion gaps—you can achieve a durable and professional finish.
The beauty of timber cladding lies not just in its aesthetic appeal, but in its ability to create architectural aesthetics that are unique, improve insulation, and even cleverly conceal minor wall imperfections. Whether you're aiming for a rustic retreat, a sleek modern look, or a practical yet stylish solution for high-moisture areas with WPC, the principles we've covered will empower you to undertake your project with confidence.
Ready to start your change? Our team of design-led cladding specialists is here to help you choose the perfect material for your project. Explore our extensive range of internal cladding and other premium solutions.
For personalised advice or to discuss your project, contact Clads Australia today. To see and feel the quality for yourself, request your free samples and take the first step toward a stunning new interior.